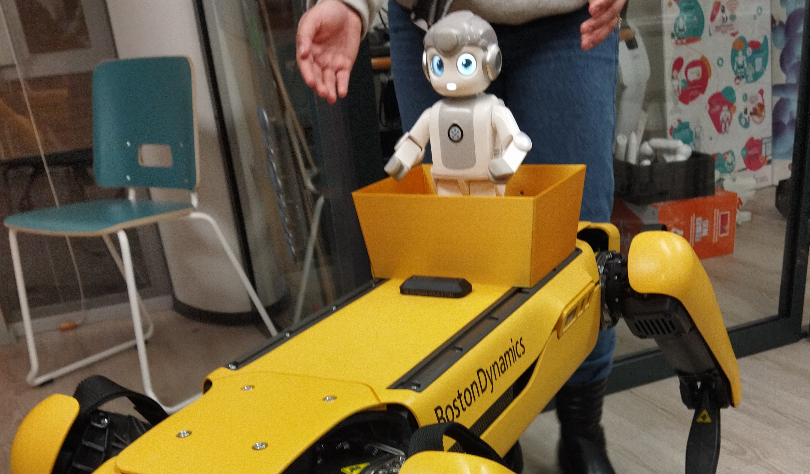
Our solution to this was to pair Spot with another robot who could do the talking in Spot’s place. The robot we chose was AlphaMini, a small humanoid robot that can be preprogrammed to do many activities, including speaking. The next issue we faced was how to make both of them seamlessly travel together. Thankfully Spot was made by a forward thinking team who had designed it in such a way that additional extensions may be quickly added. We used that to our advantage and created an accessory where AlphaMini could be carried easily and safely on Spot’s back.
To make the design as safe and multipurpose as possible, we chose a basket type design. We considered the varying options and settled on 3D printing for its preciseness to match Spot’s design schematics. We had little to no knowledge on 3D printing, but we took it as a challenge and started learning via materials we found online.
The printing process in detail
Most of the design process centered around the printing. If you’re a total rookie like us, you can follow this post to help you with your own design process!
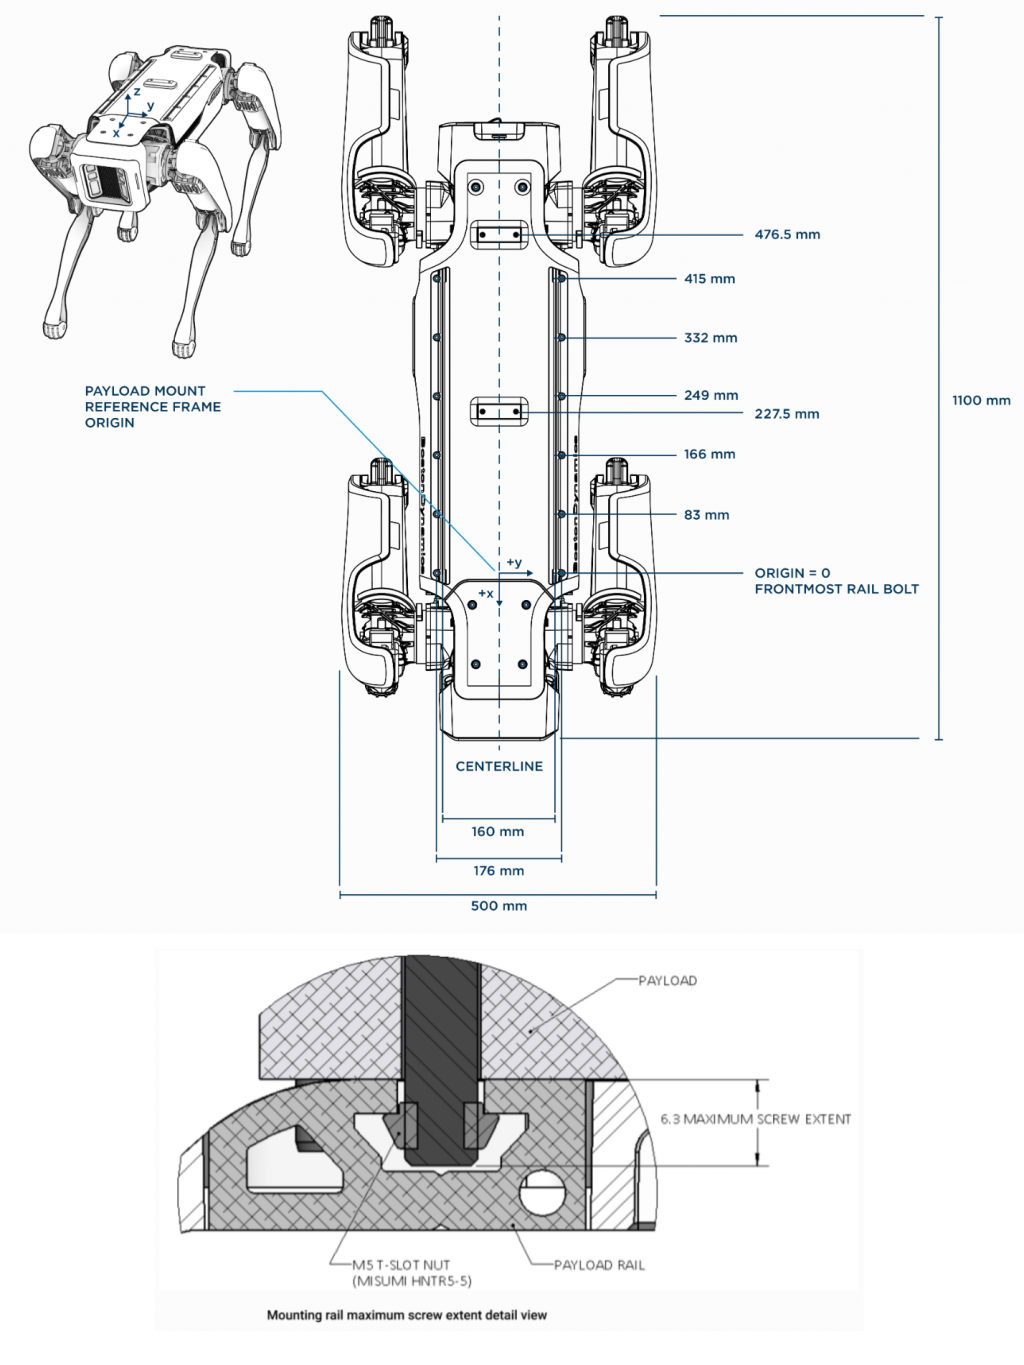
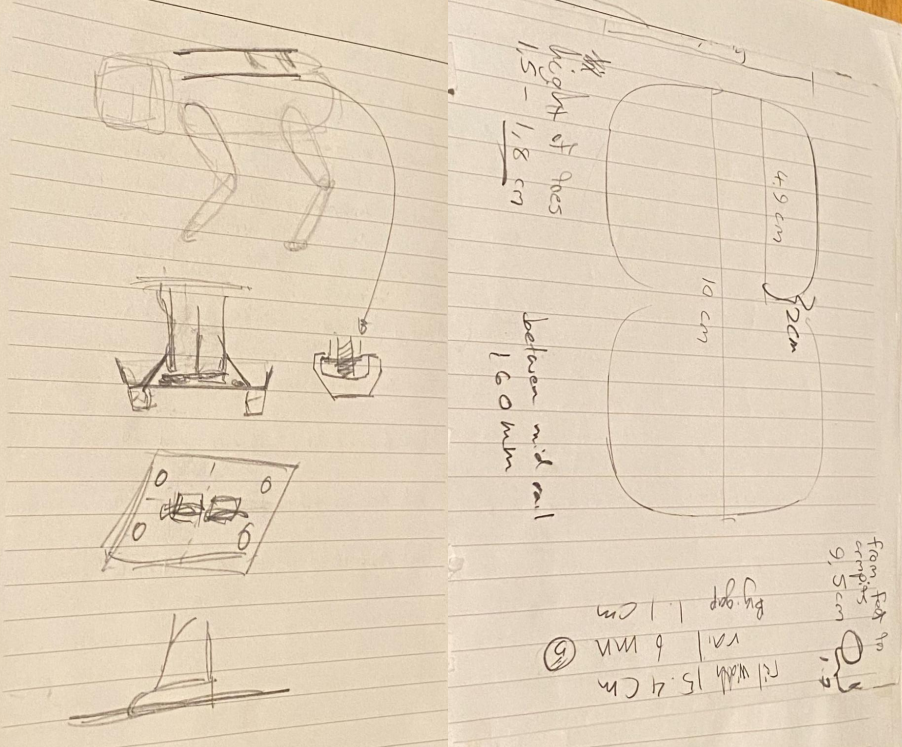
The first thing we did was sketching the design so we could have a rough concept idea. The basket design was first done on paper, with some dimensional details added in based on the Boston Dynamics developer documentation. As a small addition, the basket has slots for AlphaMini’s feet for AlphaMini’s safe attachment so it doesn’t fall off when Spot is moving.
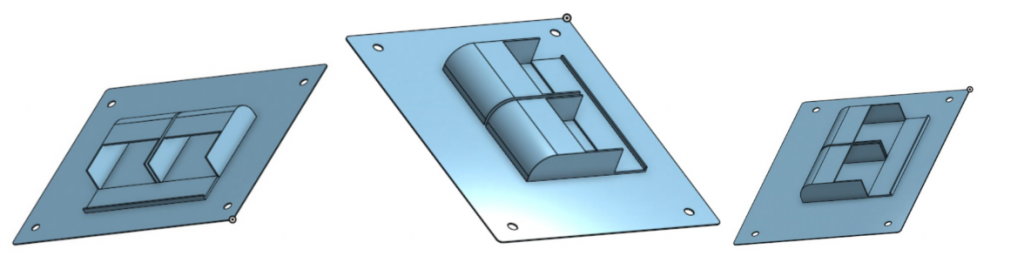
To design the basket in 3D we used Onshape 3D modeling tool. It is available for free, and you can use the cloud version with a student account to access all the features. There are plenty of online tutorials available to teach how to use the software to design a 3D model.
We wanted to build a prototype of our design to make sure the dimensions we used are correct before printing the complete basket. To do this, we first printed only the bottom part of the basket without the rims.
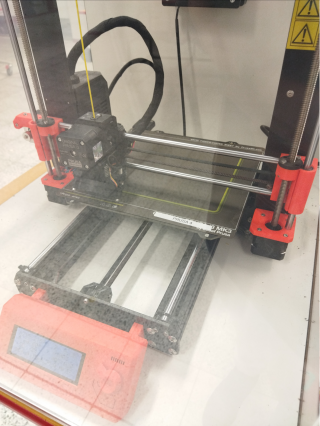
Using the printer for the first time was rather difficult. First you need to book a printer from the Hervanta FabLab to print your 3D model. You can visit the FabLab web page to get all the details about booking a 3D printer. You can also ask for help with the printing process from the people at FabLab.
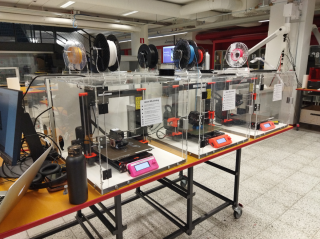
We used the Prusa i3 MK3s (Plastic Printer 250x210x210 mm) for our printing. One mistake we made was that we booked the printer without actually knowing how much time it takes to print the design. On our first time we ended up running out of time due to not booking a long enough slot. So before booking the printer, remember to visit the FabLab and use the Prusa Slicer software to slice (prepare for printing) the design and check how much time it takes to print the design. Then book the printer for the required amount of time. We had to learn it the hard way!
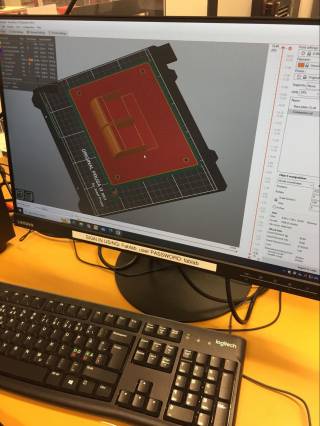
When the design is sliced, the program creates a small file of the design that can be moved to an SD card. To print the design, take the SD card from the printer you’ve booked, move the file there at the computer, and then put it back into the printer. More details about this are available in FabLab and the staff is very helpful if you need any support.
Before print you need to select the material you’ll be using for your print. We used a standard PLA of our preferred color and loaded it into the machine. The instructions to load the material are also available next to the machine. Once the material is ready, you need to clean the printer bed with the isopropyl alcohol so your print will not be contaminated with any material left on the printer bed. Now you are all set to print. The print time shown on the printer is very accurate, so you can leave the printer to do its work and come back when it is done.
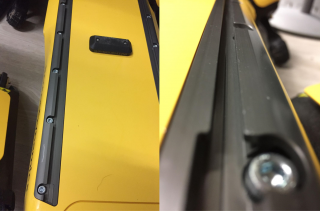
After completing our first design, we checked it with Spot. Most of the dimensions were accurate and we did a few trial runs with it and found few issues with the foot slots and some practical issues. We re-measured the areas that didn’t fit as expected and updated the design. We also wanted to print a prototype of the connector bolts we designed so we could check them too. After testing the prototypes of the base plate and the connectors, we finalized our design with few minor adjustments. Between the final print and this stage we printed one more prototype to be sure about the design and we were quite happy with the outcome.
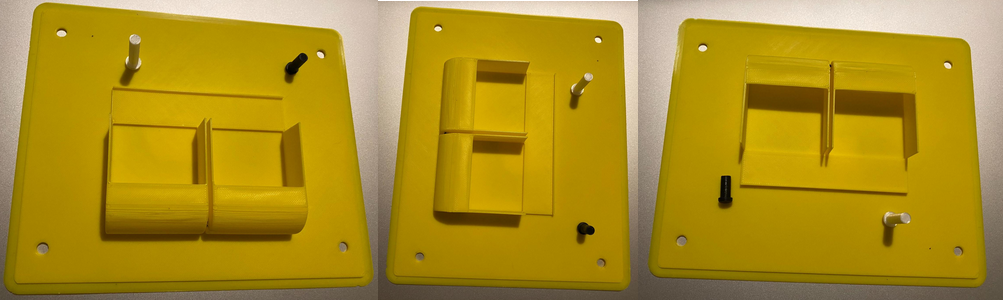
The final design
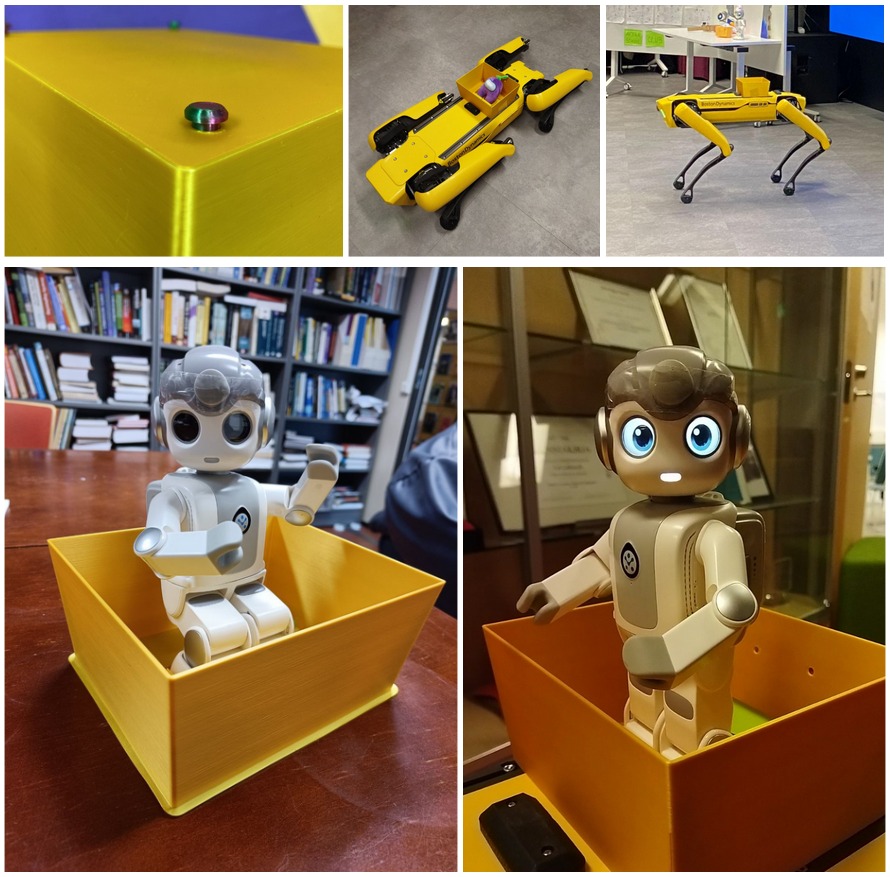
The final basket design along with the connector bolts ended up looking super great! We tested the full suit with Spot and AlphaMini and were very happy with the results. During our final course demonstrations we received high praise for the basket, which made us very happy. People were especially charmed by the color choice, which resulted in the basket’s nickname being the “Golden Carriage”.
For maximum safety, additional tape can be used to secure both the basket and AlphaMini. We concluded that there should always be someone following AlphaMini and Spot close by in case Spot makes sudden movements and either trips or drops AlphaMini. AlphaMini also seems to be notoriously bad at rodeo, so having Spot dance or bow is not safe when AlphaMini is riding.
*** Note: The basket was designed to keep AlphaMini stationary when Spot is moving. AlphaMini is unable to move when attached to the basket and the interactions we programmed for were carefully picked and tested to make sure there is no feet movement during any of the actions. Such movements may damage AlphaMini and the basket. So please pay attention to the programming of AlphaMini if you are using the basket.
The basket and the connector bolt design file can be accessed using the following URL:
Design by Uthpala Weediyabandara. You are allowed to freely print and modify the design.
Blog post written by the User Experience in Robotics course team: Carita Roti, Uthpala Weediyabandara, Dakshika Kulathunga, Jesse Kiviniitty & Savannah Nowak